 VMware’s latest release of the vSphere virtualization suite, version 6.5, changes how they handle vNUMA presentation to a virtual machine, and there’s a high likelihood that it will break your virtualized SQL Server vNUMA configuration and lead to unexpected changes in behavior. It might even slow down your SQL Servers.
Here’s what you need to do to fix it.
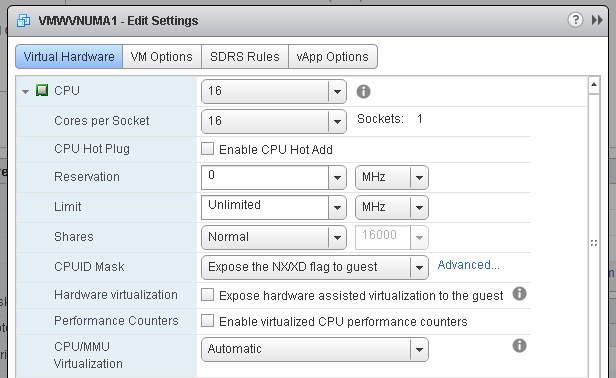
By default, for the last few releases you have been able to set the vNUMA, or virtual CPU sockets and cores configuration, appropriately on the VM through the basic CPU configuration screen.
With this setting on versions of vSphere between 5.0 and 6.0, regardless of the physical server CPU NUMA configuration, your virtual machine would contain one virtual CPU socket and 16 CPU cores. You had the serious potential to misalign your VM with the physical CPU NUMA boundaries and cause performance problems.
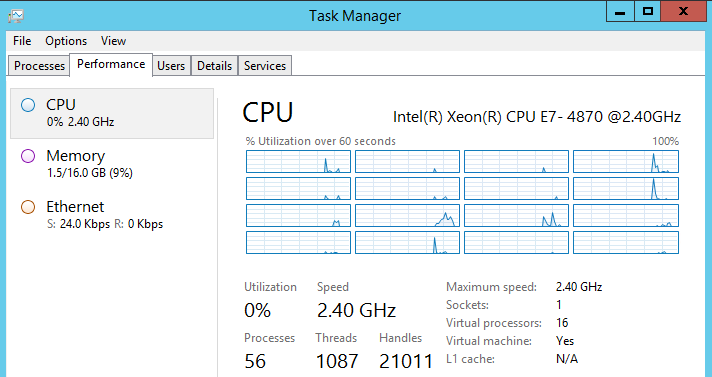
By default on vSphere 6.5, these settings are ignored. Look at SQL Server when you power on this VM.
The hypervisor picked up that the host hardware contained 10-core CPUs, and automatically adjusted the vNUMA setting to a 2×8 configuration in an attempt to improve performance.
I appreciate their attempt to improve performance, but this presents a challenge for performance-oriented DBAs in many ways. It now changes expected behavior from the basic configuration without prompting or notifying the administrators in any way that this is happening. It also means that if I have a host cluster with a mixed server CPU topology, I could now have NUMA misalignments if a VM vMotions to another physical server that contains a different CPU configuration, which is sure to cause a performance problem.
Worse yet is that if I were to restart this VM on this new host, the hypervisor could automatically change the vNUMA configuration at boot time based on the new host hardware.
I now have a change in vNUMA inside SQL Server. My MaxDOP settings could now be wrong. I now have a change in expected query behavior.
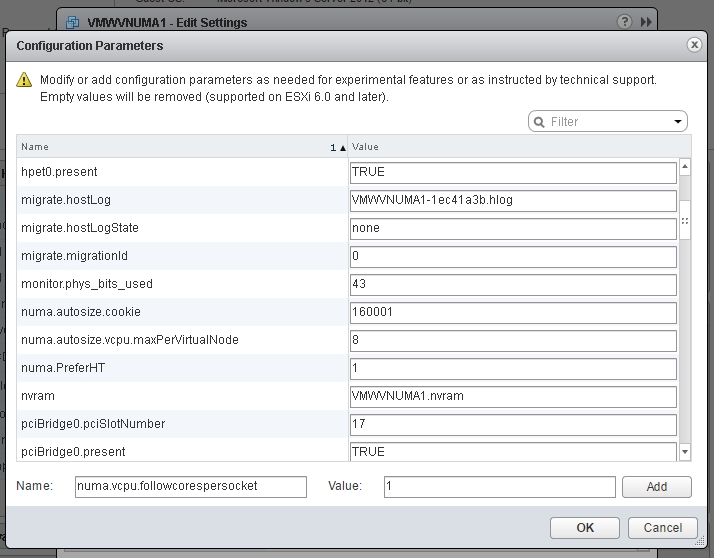
To have maximum control over the expected behavior of this SQL Server VM (and you are free to slow down the VM by forcing settings on this VM if you are not careful), you can adjust this behavior in the following ways. The VM must be powered off and certain advanced parameters entered into the VM configuration. Edit the VM settings, go to VM Options, expand Advanced, and click ‘Edit Configuration’ next to Configuration Parameters.
Now you need to think a little bit here. How many CPUs do you want total, and how many NUMA nodes do you want presented to the virtual machine?
Add the following configuration parameter: numa.vcpu.followcorespersocket = 1.
Change the configuration value ‘cpuid.coresPerSocket’ to the number of vCPUs you want present on one CPU socket.
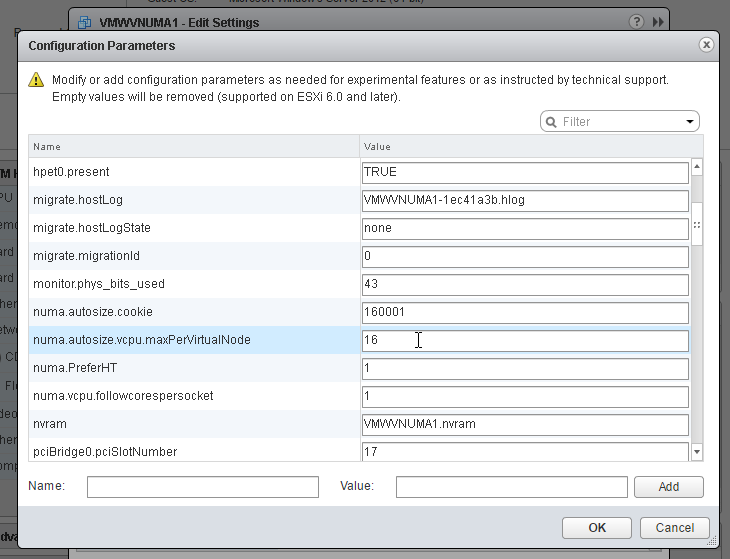
Set the number of max CPUs per NUMA node to this same value with the parameter numa.autosize.vcpu.maxPerVirtualNode.
Voila. You’re back to expected vNUMA behavior.
More details on these parameters are found here, and more advanced parameters are found here. Validate your performance before and after you make any of these changes so you don’t slow something down, and work with your infrastructure admins so you know exactly what physical CPU NUMA topology you have underneath your virtualized SQL Servers and what changes you should make with these settings.




Recent Comments