 One of the biggest differences with managing SQL Server Linux is with drive presentation. With Windows, we’d all scream if we saw a SQL Server with just one drive (C:) and everything piled on it. The same goes for any other operating system, including Linux. But, how do we get the additional drives added and configured properly? It’s (not) the easiest, but it’s straightforward! Let’s walk through it.
First, create additional drives for your SQL Server data, logs, and tempdb objects. At the time of this writing (RC1) we can’t move the default location for the SQL Server installation itself, but we can move everything else as needed. I’m creating three additional drives, each on their own virtual disk controller, so that we can better distribute the workload. Add additional drives as necessary per your own organizational standards. Create the drives with somewhat different sizes so that they are easily identifiable.
The drives I created are a tempdb drive with 200GB, data drive at 500GB, and a log drive at 250GB.
Once connected to the server, issue the following command to list all block devices on this server with elevated priviledges.
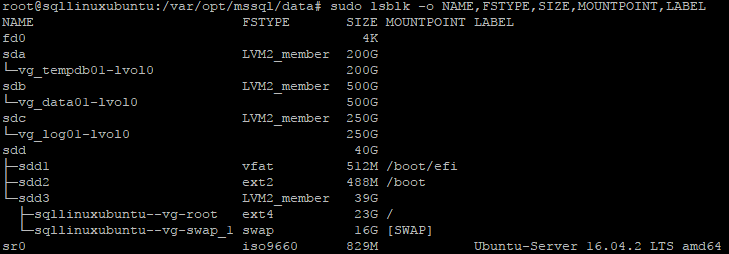
lsblk -o NAME,FSTYPE,SIZE,MOUNTPOINT,LABEL

We see that all four of the drives show up in the list. Because of the nature of how I presented the disks to the VM, the bootable drives (sdd) show up at the end of the chain instead of the beginning, but that’s OK. It doesn’t change how the disks are bootable.
We are going to use the Logical Volume Manager (LVM) to manage the disks for us instead of using regular partitions. On Windows-based servers, Windows has the ability to expand partitions without incurring any downtime, and we want to have the same flexibility from a Linux standpoint. With elevated priviledges (for the rest of the commands), let’s scan the drives to look at what it sees.
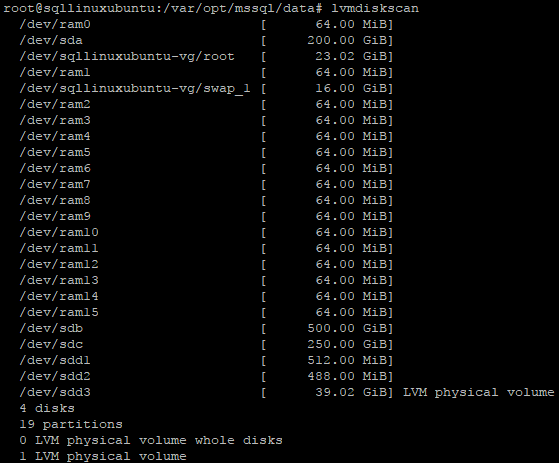
Exclude the RAM objects, and we see the raw drives that we added (/dev/sda, sdb, and sdc in this case). I now want to create our drives with LVM now. The command pvcreate allows us to manage the physical block devices. Create a LVM volume for each physical volume.

Create a volume group for each of these drives (we want independent control of each) with the command vgcreate. Name it appropriately.
Now create a logical volume for each of these volume groups using all free space available in the volume group using the command lvcreate.

Re-run the lsblk command to see the new volumes that were created.
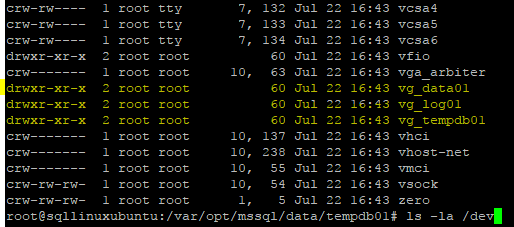
These volumes are also now visible under the /dev folder.
Notice that the lvol0 extension is gone? It’s hidden underneath these objects. More on that shortly.
Let’s format a volume! SQL Server on Linux supports the ext4 and XFS file systems. I personally prefer XFS as it is a little better with large files, so we’ll format it this way. The command mkfs.xfs allows us to format the logical volume for the XFS file system.
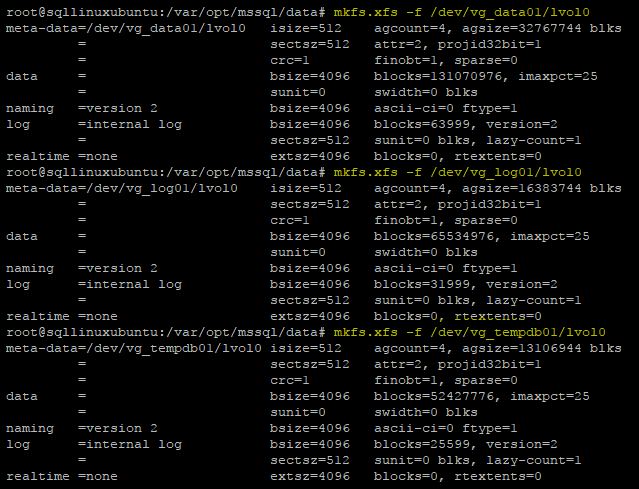
This command formats the file systems very quickly. Format all of your extra drives.
These drives are now able to be used by the file system, but we need to place them in a spot where we can get to them.
In the /var/opt/mssql/data directory, create folders for each of these drives to be mounted under with the mkdir command.

As of right now, the SQL Server instance cannot get access into these folders. You’ll notice above the mssql entries. Those are permissions for user and group. We need to change ownership on these new folders to allow access for SQL Server. Use the command chown to recursively change permissions.

SQL Server can now gain access into these folders.
Now we need to actually mount the folders properly so they come back every time the machine reboots. Use your favorite text editor (mine is vi) to edit the /etc/fstab file and add the necessary entries for the additional volumes.

Add entries at the bottom of this file for each new LVM logical volume, where you want to mount it in the SQL Server instance folder, the XFS file system, and extended parameters to make sure it comes up properly.
At this point, you can mount the drives manually on that path by issuing the command ‘mount /var/opt/mssql/data/tempdb01’ (or whatever folder you mounted it at), or as I like to do, reboot the VM so that you ensure it comes up every time you reboot due to extended maintenance.
Use the df, or disk free, command to verify that the volumes are mounted properly.
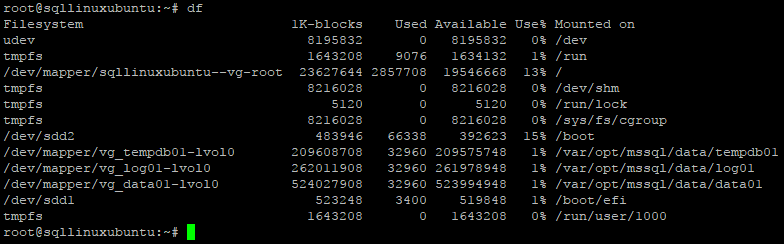
Now you have your drives set up for use on SQL Server! These drives can be extended as needed as your volume of data grows.
Next, let’s start to move our SQL Server objects! Stay tuned!
This post was syndicated from David’s home blog at davidklee.net.
Recent Comments